Showing posts with label bus interior. Show all posts

Day 10557

It's getting cold out, and my endurance on outside projects is waning as a result. This is not my time of year for outside projects, as evidenced by last year's lack of posts in this timeframe. This is when I catch up on reading and planning.

I shared the blog on reddit yesterday, so if you're coming here from there; welcome. One kind redditor recommended taking all the leaves from the pile behind the coop, and using that as bedding in the chicken's run. I moved in a few buckets of leaves today, and it was received very well by the ladies.


Based on his vocal range, the rooster has been named... Roy Orbison. I'm not naming any of the other birds, so I don't get attached to them, and feel bad when my dog (or a hawk, or a coyote, or an owl...) kills them.

This weekend, in the heated upstairs of the parent's barn, I got to work on a small project that I have been gathering pieces for. I really liked the functionality of a dish rack/shelf I had seen online, and want to replicate in the bus, and likely a future home. I liked it enough that I saved the picture to a file on Google Drive for these kinds of things. Here it is;


On Lloyd Kahn's shelter blog a few months ago, Evan Kahn posted a video of how Lloyd washes dishes (it's surprising what you find exciting on the journey to frugalism.) Guess who's kitchen that shelf rack is in? The guy that wrote the book on tiny homes, and small homes, and handmade shelter. It's in his kitchen. Doesn't that make sense? at about 1:30 Lloyd talks about it.


I used the barn's kitchen as a test dummy for my shelf. With no running water out here, this rack wouldn't be used for drying dishes, just for storing them, and freeing up a drawer. I sketched out a drawing and made some estimates, and bought several dozen 2" x 1/2" pine boards, as well as a pair of 8' long 2" x 3/4" maple boards. The maple would form the shape of the shelf, and the pine would make up the dish-rack slats. I cut the slats to shape by bundling them with masking tape, and running them through the table saw. This saved a lot of time!


I glued each slat into position, and kept them snug with the maple rails using the weight of college textbooks (gotta get the value out of these things, they're way overpriced) and clamps.


I had to play with the size of the gap. The plates all sit in between the slat comfortably. I could go with smaller slats when I make another one of these.


The finished product was set upon a couple of lantern crates (these crates are good for just about everything.) I had been using these crates as a way of conveniently bringing a bunch of things up north to the bus, and as a bookshelf. Now I need more of them again.

Day 10384

Quick update on a few background projects;

When I had the electrical cabinet pulled out in the bus, I took the opportunity to build a much-needed shelf into it. The shelf will provide me with more storage, a place to set the radio so that I can close up the exposed wiring in the cockpit, and more vertical wall space to hang a calendar or pictures (the bus is lacking in wall-space.)

I had set aside two nicer maple boards a few months ago, so I grabbed them an trimmed them to fit. This wasn't exactly easy; finding "level" on a bus parked on a slope, with a sloped floor, and a curved roof presented some challenges. I ended up using a triangle square to just make the sides of the shelf perpendicular to the table it was over, then measured the location of the shelf from there so that the shelf was square.


To lock in the shelf to the walls, I routed the wood with multiple passes over a tablesaw, adjusting the cut by 1/8" with every pass to carve out a 3/4" wide groove. With a small wood chisel I cleaned up the cut. The wood is slightly warped toward the heart it was cut from, which helps keep pressure in the cut, keeping the shelf tight.

The side walls were trimmed down to match the roof contour with eyeball, jigsaw and sandpaper. "Good enough."


It ended up coming out alright. The bracing of the shelf actually makes the cabinet a bit more sturdy. The whole assembly is held to the bus by 5 sheetmetal screws, making it easy to remove in only a few minutes if I need to have clear access to the electrical panel. Work is not done; I'm going to add a bit of backing to the shelf, and I ought to stain it or paint it. I'd like another shelf like this in the back of the bus, as well.


Today I cranked the little Case 444 over, and brought it into the main barn for a good going-over. Being up at the property this past weekend, I realized the need for this handy little machine, it's beat-up mower deck, and 3 point hitch with back-drag blade. It has been sitting in a state of disrepair, bordering on neglect. The tires are all soft. The gas is old (it still started!) The engine oil needs changing. The hydraulics leak from a few spots. These things should be remedied before I bring it up North.


It's hard to work under, as low to the ground as it is, so I used my dad's tractor's loader to heft the front end onto a bench. Much better.


I rummaged through the confined hydraulic lines in the frame, trying to find the source of the leak. What I thought was leaking (the big "OUT" line B-nut coming out of the valve) turned out to be fine; the return line from the mid-frame lift cylinder (the cylinder that lifts the mower deck) was blown, and dripping onto it (pictured above.) I removed most of the lines coming out of the valve, and brought them to Sanel's machine shop to get replaced.

The lift cylinder on the 3 point hitch also came off. The cylinder hadn't been plumbed correctly anyway; there was no return line for the hydraulic fluid to "leave" through. Return fluid went backwards into the valve through the pressure line. The cylinder drips, and the pushrod is corroded. I took it to American Hydraulics in Bow, where Jeff helped me figure out what I could do to replace it. I think I found an adequate replacement cylinder online, but I may need his services yet to craft it into the cylinder I need!

Once I'm done throwing parts and money at the 444, I will drive it onto the trailer and take it North (where it came from!) I'd like to use it for hauling brush, smoothing loads of gravel on the path in, and mowing out a section where the bus can park to keep some less-neighborly wildlife at a distance. 

Day 10236

Winter's cold has slowed my pace of construction and tinkering on the bus, and the homestead vehicle collection. The panels aren't on the bus roof yet. The backhoe still sits in the barn.


I did, however, install the bench vise that aunt Zowie got me for Christmas. Thanks Zowie!

I did put a bench seat in the truck (remember I picked that up in Massachusetts in the last post?) The bucket seats were more than a little gross, and I think the mice were living in them.


With angle grinder, drill and wrench, I got the carriage bolts out of the cab and pulled the old seats. It was way more fun than you'd imagine. By that I mean it was awkward holding mechanic yoga poses, and my hands were freezing the entire time. I vacuumed the carpet. My mum came over and asked if it was the carpet or the seats that smell like cow manure... good question. This truck has fragrance.


Then the new old bench seat went in ($100 on craigslist, out of a rotten '85 F150.) I dressed it up with a worn-but-classy 1940's blanket I found on Etsy. I cut two small slits for the seatbelts to poke through. 

Etsy is a dangerous place, for the record.

I also bought a hydrometer for the bus's batteries. The cold is hurting those poor things, and it's been too cold and icy for the delicate work of installing the solar panels. Just running the bus once a week to keep the batteries charged isn't enough to keep these deep-cycles healthy; they need a good equalization, or overcharge, which the bus engine's alternator can't provide. The solar panels, however, can provide an equalization charge through the Morningstar charge controller once that system is up and running. All I want is one nice, sunny, 40' day...


The bus wouldn't start on it's own the other day; the engine would turn but the voltage and amps weren't high enough to light the glowplugs, as well. I shoveled and plowed a path down to it, and jumped it with the bed-less F350 (the ride, on the new bench seat, was quite pleasant.)

You may recall that these batteries once powered the bus. The same day I put the bench seat in I changed the truck's battery terminal lugs over to post-type, ditching the beat up clamp-on style. Without the lead adapter pieces on the battery terminals, the hood closes all the way! Hooray, less fire/electrocution hazards! I don't have any pictures of that job because I was cold.

After a full charge, and letting the voltage settle down for an hour, I used the hydrometer to check the bus battery's charge. Each of the individual T105's has 3 cells (a battery cell is ~2 volts.) The battery acid in a fully charged battery has a different specific gravity than that of an uncharged battery. With the hydrometer I found that two of my batteries were scoring in the 85% capacity range, and two were in the 70% range. They need an equalization, but it's going to have to wait until warmer weather and free time comes around simultaneously. I didn't take any pictures because I was working with battery acid... and I was cold.

In the meantime, I've been reading... a lot. I read Gaining Ground, by a disciple/contemporary of Joel Salatin's; Forrest Pritchard. After his parents make a profit of $18.16 off several truckloads of corn and soybeans, Forrest returns from college with the mission of saving his family's farm. Very good read with a lot of humor! I also read through the "Wranglestar" family's book, Modern Homesteading. I've been a big fan of Cody's videos on YouTube, and enjoyed this summary of the family's journey that was mostly stitched together by Mrs. Wranglestar. Now I'm onto Everything I Want to do is Illegal, by the illustrious Joel Salatin. I got to see him this weekend, at a National Organic Farmer's of America conference. As the keynote speaker he gave a talk with many of the themes of Folks, This Ain't Normal. He was preaching to the choir, but I enjoyed it very much.

The land search continues, and I've elected to set my sights farther North, for various reasons.

Day 10111

Over the past week I've closed a lot of loops and finished a bunch of small projects. I'm running out of things to do on the bus! Last week I spent a few nights sleeping in it, and found it to be very comfortable. Most of Day 10109 was spent in the bus, cooking reading and doodling. Good lounge day.

I'm skilled at procrastinating something I don't want to do, and accomplishing a lot in other areas. Lately I've been putting off the backhoe rebuild (a greasy, knuckle-busting job) in favor of cleaning up the barn before winter and getting rid of things I don't use or need. A few large bins went to the Salvation Army.

A quick after-work project was replacing the worn-out batteries on the F350 with the bus's old batteries, which was brought on by the truck not having enough power to get started the other day. I had intended to replace the old beaten terminals on the truck's battery cables, but the project proved to be quite daunting, and I elected to not fix what wasn't broken. With the assistance of a set of channel-locks used as a hammer, I got the beaten old terminal ends over the new battery lugs. Whatever.


She lives! The wire harnesses were neatened up as well as I could; they're a mess from the cab swap. I also noted the starter solenoid is a massive blob of rust, and imagine that could be the source of it not starting from time to time. I'll replace that when I find some motivation. Fun fact; the new batteries are a little taller, and now the hood doesn't close all the way! I can still get one dragster pin's hair-pin in. Good enough.


Meanwhile, in the bus, I neatened up some of the DC accessory connections...


... finished another little light's mounting bracket...


... and installed the trim piece I had removed from the fireplace in front of the cabinets.


Saturday I cut some scrap siding into little triangles, and used some aluminum bar stock to make much needed book-ends.


I painted the bookends with leftover bus paint as little mountains. Now my small bus book collection is a miniature mountain range. 


I took a piece of Maple I had purchased a few weeks ago, and made a coat rack with a bunch of cheap cast-off (i.e. they still do their job but they aren't as pretty) Shaker pegs. The pegboard was installed in the mudroom; also known as "the staircase" or "the area immediately to the right of the driver's seat," if you want to get technical.


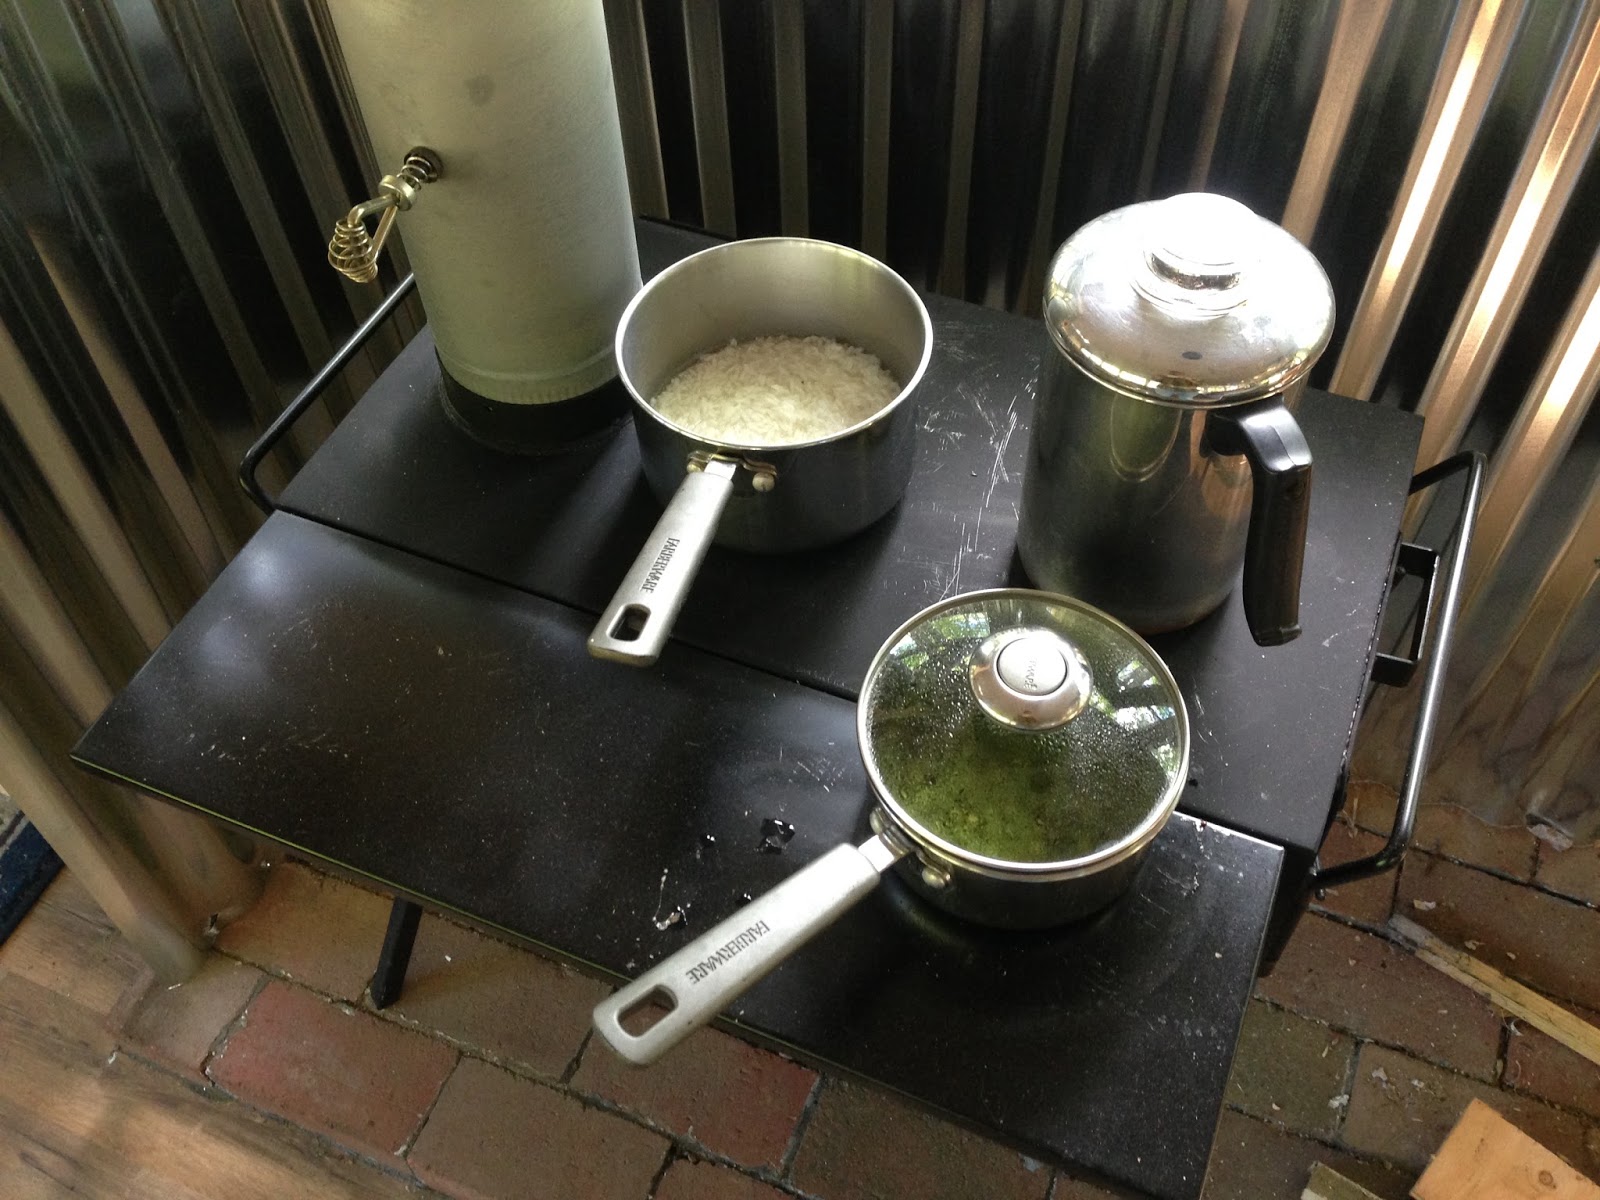
Break for lunch; rice and peas on the wood-stove, with some re-heated percolated coffee. Mmm.


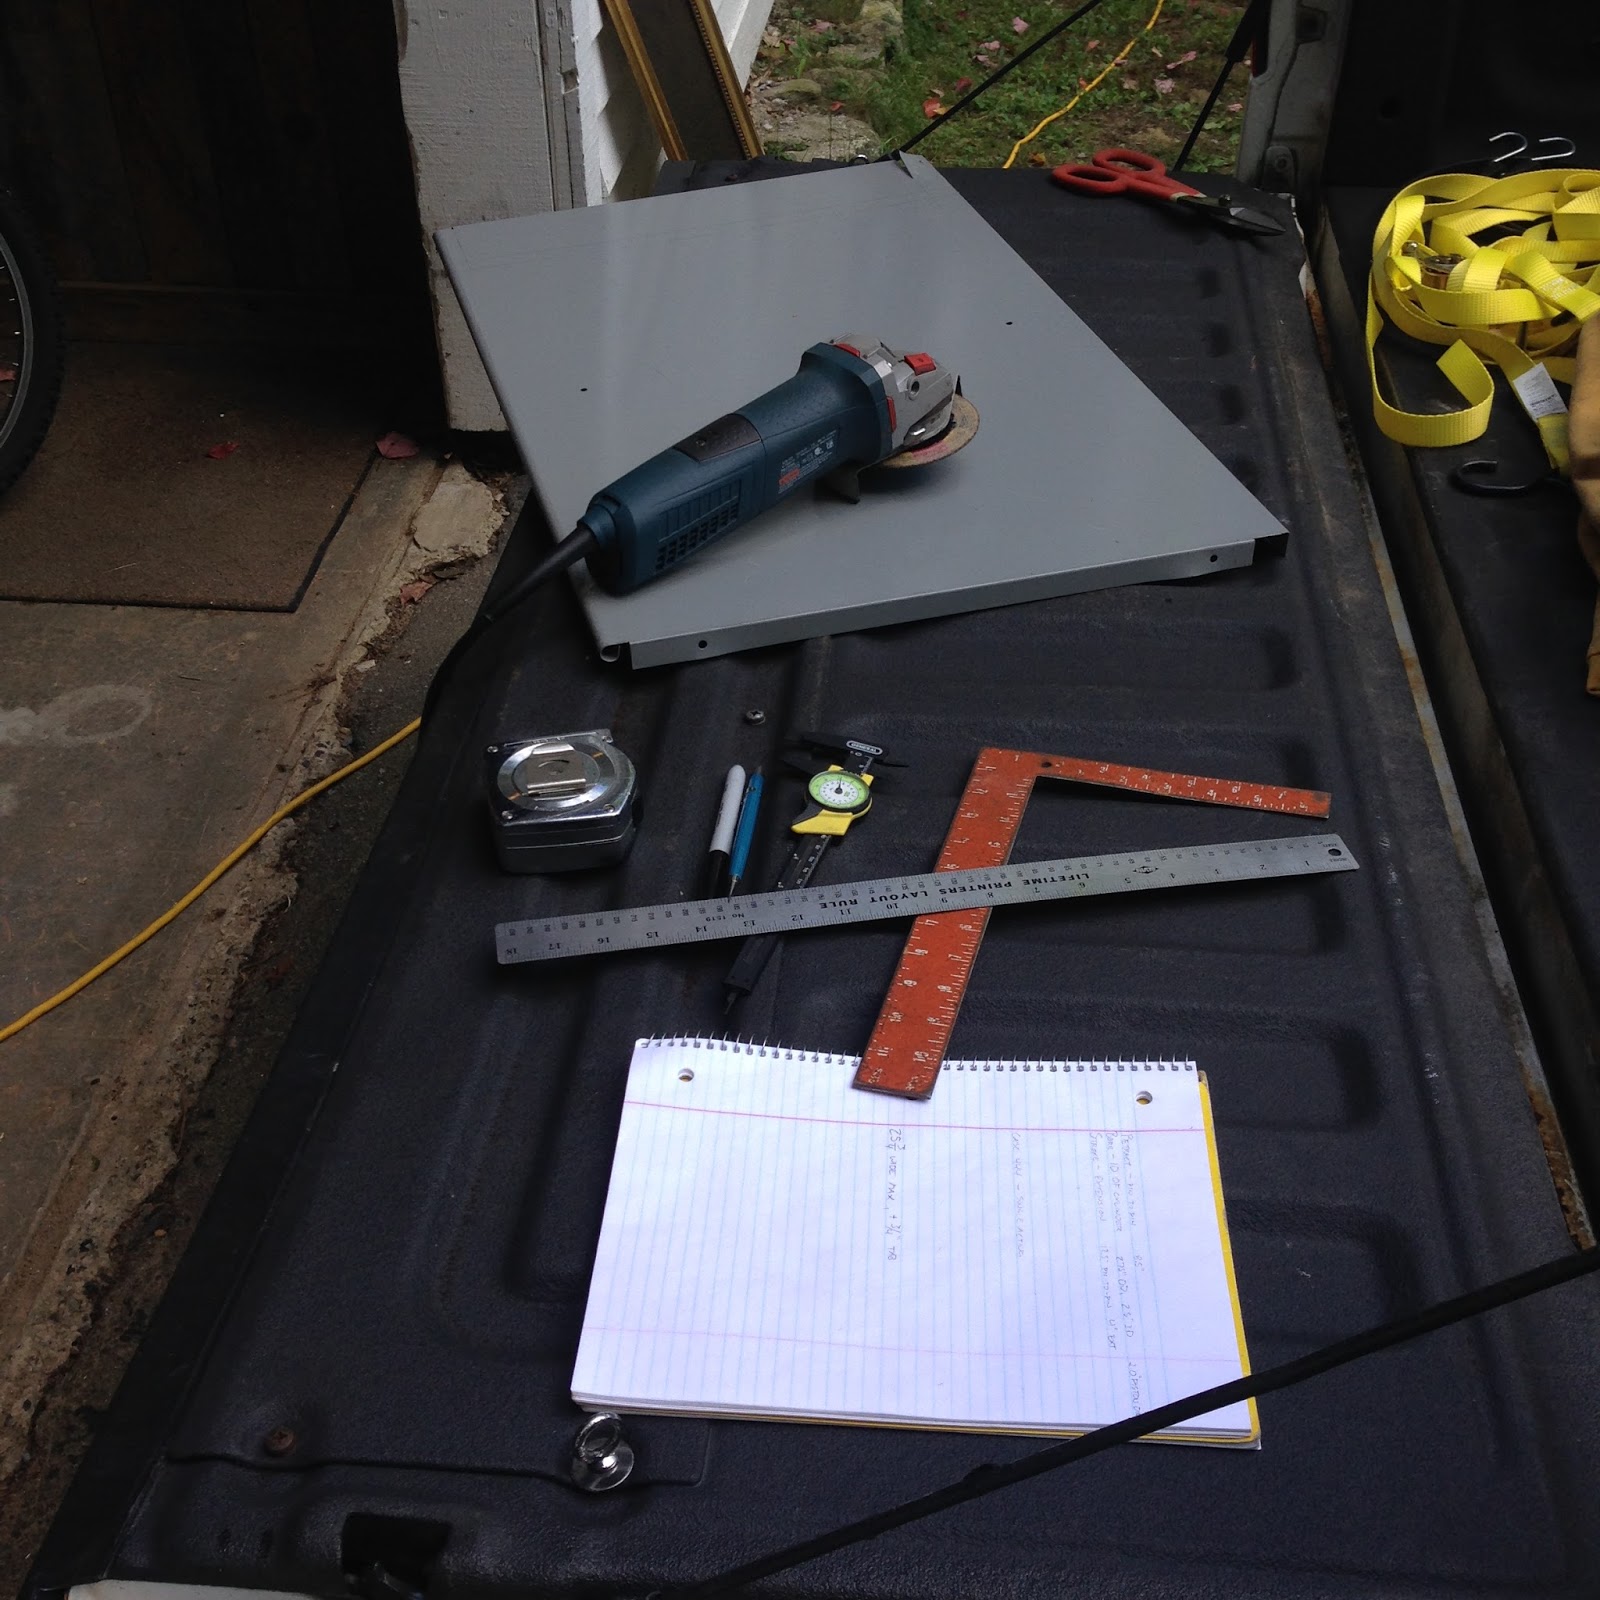
Then on Day 10110, I took on the metal panel for the chimney's window. This piece will serve several purposes; it will be a structural support to the chimney hanging out the window, keep the rain and snow from getting in, and keep the warm air from getting out. I also wanted to make it in such a way that removing it wouldn't be a nightmare (so nothing too permanent.) My starting piece was a steel shelf, acquired surplus from a certain government building's scrap metal bin. The shelf had 3/4" tabs that I wanted to retain, as I could inset the piece into the window's recess in the bus's sheet-metal. 


After some measuring, guesstimating and eyeballing, I drew out what I needed on the piece, then cut it to shape with the angle grinder. See the new 3/4" tab?


Next I bent my new 3/4" tab up. At work we have a large tool to do this quickly. At home I have vise-grips and patience.


My piece cut to shape, I measured the top, bottom, left and right limits of where the stovepipe wanted to sit, coming out the window. The pipe has a five inch diameter, but climbs out the window at an angle, so the up-down measurement was closer to six inches. I used the four inch hole saw to cut out the center, then finagled the tin snips into the hole to cut twelve tabs all the way around.


In a technique that I unabashedly stole from the Splitting Elm blog, I bent the tabs in and out, mounted the panel into the window-frame, then screwed the pipe into the hole. I like how they did this. I got lucky, here; it fit without much adjustment.


Finally, to literally top it all off, I found a sharp looking cap on eBay, made in Maine, USA. It arrived yesterday, and I installed it after work today. Four feet of stovepipe past the exterior elbow gives me enough draft that I'm not filling the cabin with smoke when I start a fire, AND no longer setting off my smoke detector, which seems to be a slightly louder version of the INCOMING alarm at Jalalabad.


I'm really happy with how this came out. What used to be an oddly painted bus with furniture is now clearly a small home.

Day 10102

I spent most of the day working my DC accessory bus.  I now have three electrical systems, all drawing power from the same shared battery bank.

The first is the bus's 12 volt DC system, which the bus was born with at the bus factory. I can turn this system on with the bus key to accessory or ignition, and I can use the cabin dome lights, but I really don't have the ability to plug in anything else. It draws 6 or 7 amps to run headlights and some other bus electronics. The headlights also may or may not turn on when I turn the key to accessory; it's totally random, mysterious, and another 2-3 amps when they're on.

The second electrical system is the 120 volt AC system, which is what the inverter produces. With the inverter I have more lighting, but more importantly the ability to run power tools. When I run the 2000 watt inverter, I try to load it and charge as much as I can for efficiency's sake. The inverter draws about 3 amps running with no load, and makes a humming noise (which is why I put a cabinet over it.)

And now I have a third system, which I'm calling the DC accessory bus, which is another 12 volt DC system wired right off of the battery bank. This system will be seeing the most normal day-to-day use of any system; on it I have the water pump and a several new cabin lights. I wired the system with 2.1mm jacks, much like you'd see for charging a laptop. With two bright 3W LED spotlights, I'm showing a current draw of 0.5 amps, so I could run these lights for a bit more than a month straight before I'd drain the battery bank.

I used a six bank Blue Sea Systems circuit breaker panel, and a bunch of 2.1mm male and female fittings I got off Amazon. Again, when you need something for a bus build that is somewhere between an automotive product and a house product, the marine supply stores online seem to have what you need! I spent most of the morning cutting wire and soldering terminals. I mounted the whole assembly on a sheet of scrap acrylic sheet cut to size, for ease of installation in the cabinet.


The panel mounted in the cabinet, and illuminated by a 3 watt LED it is supplying with power. I did manage to blow an auto-style fuse going into the circuit breaker panel by crossing some wire ends. Oops.


The DC panel next to the AC inverter. The new DC bus will be used for low-current day to day stuff like lights and the water pump. The inverter's AC system will be used for charging tool, laptop and phone batteries, and running power tools.


I made several "extension cords" today, and secured them along the ceiling with panel screws and small plastic lamps I had lying around. 


I crafted mounting brackets for the little spotlights out of some scrap aluminum I had; basically a hole for a panel screw, a 15 degree bend made with vise-grips, and a tab that the light will get screwed onto (I need to buy some screws small enough tomorrow.) Here's the dining area's spotlight, which illuminates the table nicely.


In the bedroom I now have a reading light.


And in the back of the bus, I set a light to illuminate the open drawers of the toolbox.

I neglected to mention in yesterday's post that I added a smoke and carbon monoxide detector at the behest of my medics. The detector is sufficiently obnoxious, and I placed it above the bed. I also bought a bunch of ABC (dry chemical) fire extinguishers, and mounted a second extinguisher at the back door of the bus. I take fire prevention seriously, and the question "what happens if this fails?" enters my mind frequently while I'm working. ABC fire extinguishers are good for fighting almost every kind of fire, but not great. A CO2 extinguisher and a foam extinguisher, for fighting liquid fuel fires, would be a good thing to have when I'm out in the sticks.


Best part of the new lights; a mere 0.5 amps drawn with two of the lights on.


Day 10101

As I right this, I find the bus is uncomfortably warm... because it now has wood heat.

One of the frequent comments I heard at drill last weekend was "Wow, I couldn't do this..." I found that statement to be the most disturbing... even more disturbing then all the references about me dying in the bus like Alexander Supertramp after eating wild potato roots. I consider my audience to be a bunch of creative problem-solvers, and that's all you need to know to do something like this.

When I hear this disturbing phrase, it makes me think the person isn't confident in their own math, carpentry or electrical skills, or their ability to learn new things. I've used high school physics that I know I had learned at some point, but had neglected to maintain (14 year old Aaron, science geek and Trekkie, would be ashamed that this is what he had become) and had to teach myself. Mainly electricity, but hooking up my water pump wasn't exactly intuitive, either. I have three primary sources for learning about these kinds of things; my friends, the internet/books, and the scientific method. Friends are the easiest resource to utilize with tough problems. The internet will usually yield an answer after a few Google searches and YouTube videos. Trial and error is slow but effective; especially if you take notes.

Given my profession, I feel pretty confident in the use of hand and power tools, which I think many are embarrassed to say they aren't familiar with. Like many other things tools are best learned by jumping in and using them. I have purchased tools which I had no idea how to use until I screwed it up a few times and talked to friends (the backhoe and welder comes to mind.) I still screw things up using the wrong tool, and I'm a "professional." I know I can learn it.

Another huge help to me comes from planning. I usually have an idea, and mull it over for days or weeks before implementing it. I think about how my new idea will work with other things that are already on the bus, or with other things I'm planning. Most of the serious ideas end up on paper in sketches, which helps me visualize the idea (a skill gleaned from my Dad.) Then I start acquiring pieces I know I'll need. When time, resources and motivation come together, I get to work.
The difficulty, and I may sound like Donald Rumsfield, is not knowing what you don't know. You find out what you were missing early in projects, and I always feel like it was something obvious that I had overlooked in the planning. Sometimes this costs money, or time, and sometimes you surprise yourself with your own ingenuity when you find a creative solution to a problem. When I realize what it is that I didn't know I needed, I start making lists (a skill from my Mum) so that when I go on a parts run I can get everything I need at once (saving time, and therefore preventing frustration.)

To those reading that have doubts about their ability to do "this," be it a bus-cabin or any other minor engineering feat, know that you absolutely can. All you need is an idea and a willingness to learn. I recommend patience and a good set of tools, as well, but it's not necessary.

But I digress; that's enough mechanic zen philosophy for one night.

***

The wood stove arrived on day 10097; and after assembling it in the barn and admiring the craftsmanship during the work week, I finally got to use it Saturday morning. Included with the stove, which was designed for heating canvas tents, was a three page packet describing safe use. Two notes stuck out; run it outside first to finish curing the paint, and cook bacon and eggs on it to learn how to use it. Not having any bacon on hand I tried eggs, toast and coffee. The results were highly pinterest-able!


The Three Dog is easy to use, and baffled so that the hottest cook surface is about 8" in front of the chimney stack. The shelf on the side is how you can regulate temperature of what you're cooking. It was a brisk morning, and the little Three Dog put out enough heat that a T-shirt was comfortable when sitting around it.

My dad walked by, as I was enjoying a cup of coffee with Zeke, and commented that I've spent too much time in Afghanistan if I think things like this are enjoyable. He said this with a steel digging bar in hand, walking out back to build a stone wall... for fun. Clearly the apple doesn't fall far from the tree. We had coffee, and I continued brushing off a pile of bricks we've had lying around, to use for my fireplace.


I put the stove in idle to see how long my bed of coals would last, and started laying out the bricks on the floor. I removed the trim panel aft of the kitchen, to be reinstalled at a later date on the other end. At first I was concerned about the weight of the bricks on the floor (48 bricks at about 5 lbs each is ~240 lbs, plus a 60 lb stove) but then I thought about how big some kids are these days, and how this area was about the size of a bench seat, and the bus has probably had a pair of husky 5th graders sitting together in this spot before.


The futon is Ezekiel's spot of choice, by the way.


My bricks arranged, I knew I needed eight half pieces to round out my fireplace. I had no idea how to cut or break or split a brick, so I turned to the internet. Quick aside; everything looks easier on YouTube. People don't post a 20 minute video of them struggling to do something they aren't confident about; most videos are a few minutes, from someone who has mastered the task at hand, and make it look super easy! Just like brick-cutting. "It's easy!" said the notional YouTube guy "just score the brick with a chisel, set this special hammer on it like so, and two firm taps, voila, a perfectly cut brick!"

Well my bricks took about a dozen firm taps, and a few came apart like the one below.

Another quick sidenote, I'm pretty sure the chisel below was designed for splitting bricks. When I was a kid, playing in the sandbox, this chisel was frequently taken from my dad's toolbox for constructing the perfect roads for my collection of Matchbox cars. I'm still more comfortable making dirt highways for Matchboxes than splitting bricks with it.


I used a dab of a very strong adhesive... that I acquired expired... from military surplus... to secure each brick to the floor.


Then with a tube of mortar repair RTV loaded in a glue-gun, I went through and sealed the area between the bricks. I didn't use real mortar because I didn't think it would hold up to the frame flexing during a drive. The RTV I used was very thick, and could be carved reasonably well, so I went through after with a tongue depressor / popsicle stick to make it look more like mortar.


It still looked artificial to me, though, being one even color with no texture, so I got a few scoops of mica-rich dirt from the driveway and brushed it in. Much better. Now it looks like an original 18th century fireplace in a 2001 International school bus... just like in colonial times.


Onto the next project; the heat shield. I cut an 8' piece into three relatively even chunks using tin snips, and wearing thick leather gloves. I managed to not cut myself! 


I consulted my local fire marshal, on break from moving large rocks around the yard for fun, and discussed options for mounting a piece of Guatemala-roofing sheet-metal to protect the bus from the wood stove. Often when I hit a roadblock, where I can't continue forward with a project until I figure out some sort of solution, I will stare at it, google it, and play around with it until I get an idea or a solution appears from the ether.


My thoughts tend to wander. How will I hang this off the side, to create a few inch wide air barrier? I don't have enough little brackets on hand. Also, metal brackets will transfer the heat the panel absorbs into whatever I mount it to. I need an insulator, something glass or ceramic. Can I stick a brick back there? It will flop over. Would the hardware store have any kind of high heat insulating mounts? I don't know what those would be, and it sounds expensive...

But wait! I don't need to mount it! It can just sit on the bricks... if I can figure out how to make it not flop over... like making a frame. What do I have for scrap metal? The bus doors.

The solution now apparent after some deliberation, I plugged in the angle grinder.


I cut the pieces to size, and welded them together with some 6011 rod...


... then I nestled my sheet metal heat shield into the frame...


... and secured it with some sheet-metal screws. You may be thinking; "gee Aaron, drilling holes, then putting screws in is a lot of work, and you already have the welder going, can't you just do a bunch of spot welds?"

Well, I thought that too, dear reader. Unfortunately 3/32" 6011 at 60 amps blasts through 0.020" sheetmetal like an RPG. One corner of the heat shield now has authentic battle damage.


My rigid-frame heat-shield now installed in the fireplace, I brought the wood stove in and jury-rigged the chimney.


As it cooled down I lit the fire, which gave the bus a nice sweet smell of wood smoke, and put some music on. I sipped some equally smoky Laphroig, and lounged on the couch.


The bus now runs on diesel, batteries... and hardwood.