I struck gold on craigslist; six old Siemens 75 watt solar panels. Not only were these made in the glorious USA, but they have a reputation for durability. Like many things on craigslist, their origins are shrouded in mystery, but I will put them to good use on the roof of the bus.

The gentlemen I bought them from helped me cut the six-wide frame into three sets of two panels, which I loaded into the truck bed carefully with cardboard and blankets to keep them from harm on the ride home. Additionally, I found a bench seat that would fit the F350 (the bucket seats are pretty gross) which was on the way home from southern Massachusetts.
While the Powerstroke diesel in the nose is very good at providing the bulk charge to the battery bank, the absorption charge which completely charges a battery is best done by a tapering power source like solar panels. I have been reading up on HandyBob's blog again for more insight into crafting a solar power system (his writing was indispensable to the design of my electrical system thus far.) I also bought a Morningstar TS-45 charge controller, because HandyBob said so, which essentially feeds the batteries palatable electricity from the panels. I also bought a hydrometer to check the specific gravity of the battery's fluid, which is the best way of determining the health of the batteries. I really should have acquired one a while ago. More on these two pieces of gear in future posts.
There is a surprising amount of geometry involved in setting up a solar system. The goal will be to get all six of these panels on the roof, pointed true south for maximum sun exposure, angled for the winter sun at our latitude, and out of any shadows created by trees or the chimney. The exact location of the panels is still somewhat up in the air, but I think I'm going to put them above the front door, on the passenger side, running back to where the chimney comes out. I will have to accept an evening shadow from the chimney with this configuration, but it minimizes length of cable needed to reach the battery bank, avoiding excessive voltage drop (very important.) We'll see what happens.


For elbow room, and access to a lot of 110v amps, I elected to do this project in the big cold barn, instead of a nice warm bus. The hardware holding the panels to the thick steel frame was very corroded, so I cut the temper-resistant bolt heads off with the angle grinder (clearly not tamper-proof, or I wouldn't have been able to get them.) A hammer and punch knocked the bolts loose, then I picked the frame pieces up off the bolts, which had to be sliced in half again to remove from the thin aluminum frame of the panels.

The aluminum frames had also corroded where they were bolted in. The brown and orange material is rust from the steel frame. The off-white powder is aluminum oxide. Corrosion... gross.

The panels, standing tall on their own, free of the nasty, heavy frame. I neglected to mention earlier that all the wiring linking these panels together was still intact, and of a proper gauge for my application. More on that in the future (parts are on order.)


While the Powerstroke diesel in the nose is very good at providing the bulk charge to the battery bank, the absorption charge which completely charges a battery is best done by a tapering power source like solar panels. I have been reading up on HandyBob's blog again for more insight into crafting a solar power system (his writing was indispensable to the design of my electrical system thus far.) I also bought a Morningstar TS-45 charge controller, because HandyBob said so, which essentially feeds the batteries palatable electricity from the panels. I also bought a hydrometer to check the specific gravity of the battery's fluid, which is the best way of determining the health of the batteries. I really should have acquired one a while ago. More on these two pieces of gear in future posts.
There is a surprising amount of geometry involved in setting up a solar system. The goal will be to get all six of these panels on the roof, pointed true south for maximum sun exposure, angled for the winter sun at our latitude, and out of any shadows created by trees or the chimney. The exact location of the panels is still somewhat up in the air, but I think I'm going to put them above the front door, on the passenger side, running back to where the chimney comes out. I will have to accept an evening shadow from the chimney with this configuration, but it minimizes length of cable needed to reach the battery bank, avoiding excessive voltage drop (very important.) We'll see what happens.


The panels, standing tall on their own, free of the nasty, heavy frame. I neglected to mention earlier that all the wiring linking these panels together was still intact, and of a proper gauge for my application. More on that in the future (parts are on order.)
With the panels separated, I continued to clean them up, and think of ways I could mount them to the bus. This took some time; I turned to Google and saw a lot of things... some good ideas using perforated angle... and some horrible monstrosities using perforated angle. I personally think perforated steel angle is ugly (and not the good kind of ugly like the A-10 Warthog, Black Hawk helicopter, and all of my vehicles) so I want to minimize use in the final design.

The panels need to be able to pivot, and be easily adjustable, so that they can stare up at the summer sun, 20 degrees from horizontal, or out at the winter sun, 66 degrees from horizontal. (your latitude +/- Earth's tilt) To do this I am going to use perforated angle as both the interface between the mounts and the panel, as well as the adjustable piece of the mounting system. I bought the metal I needed, and cut my first prototype pieces with an angle grinder.
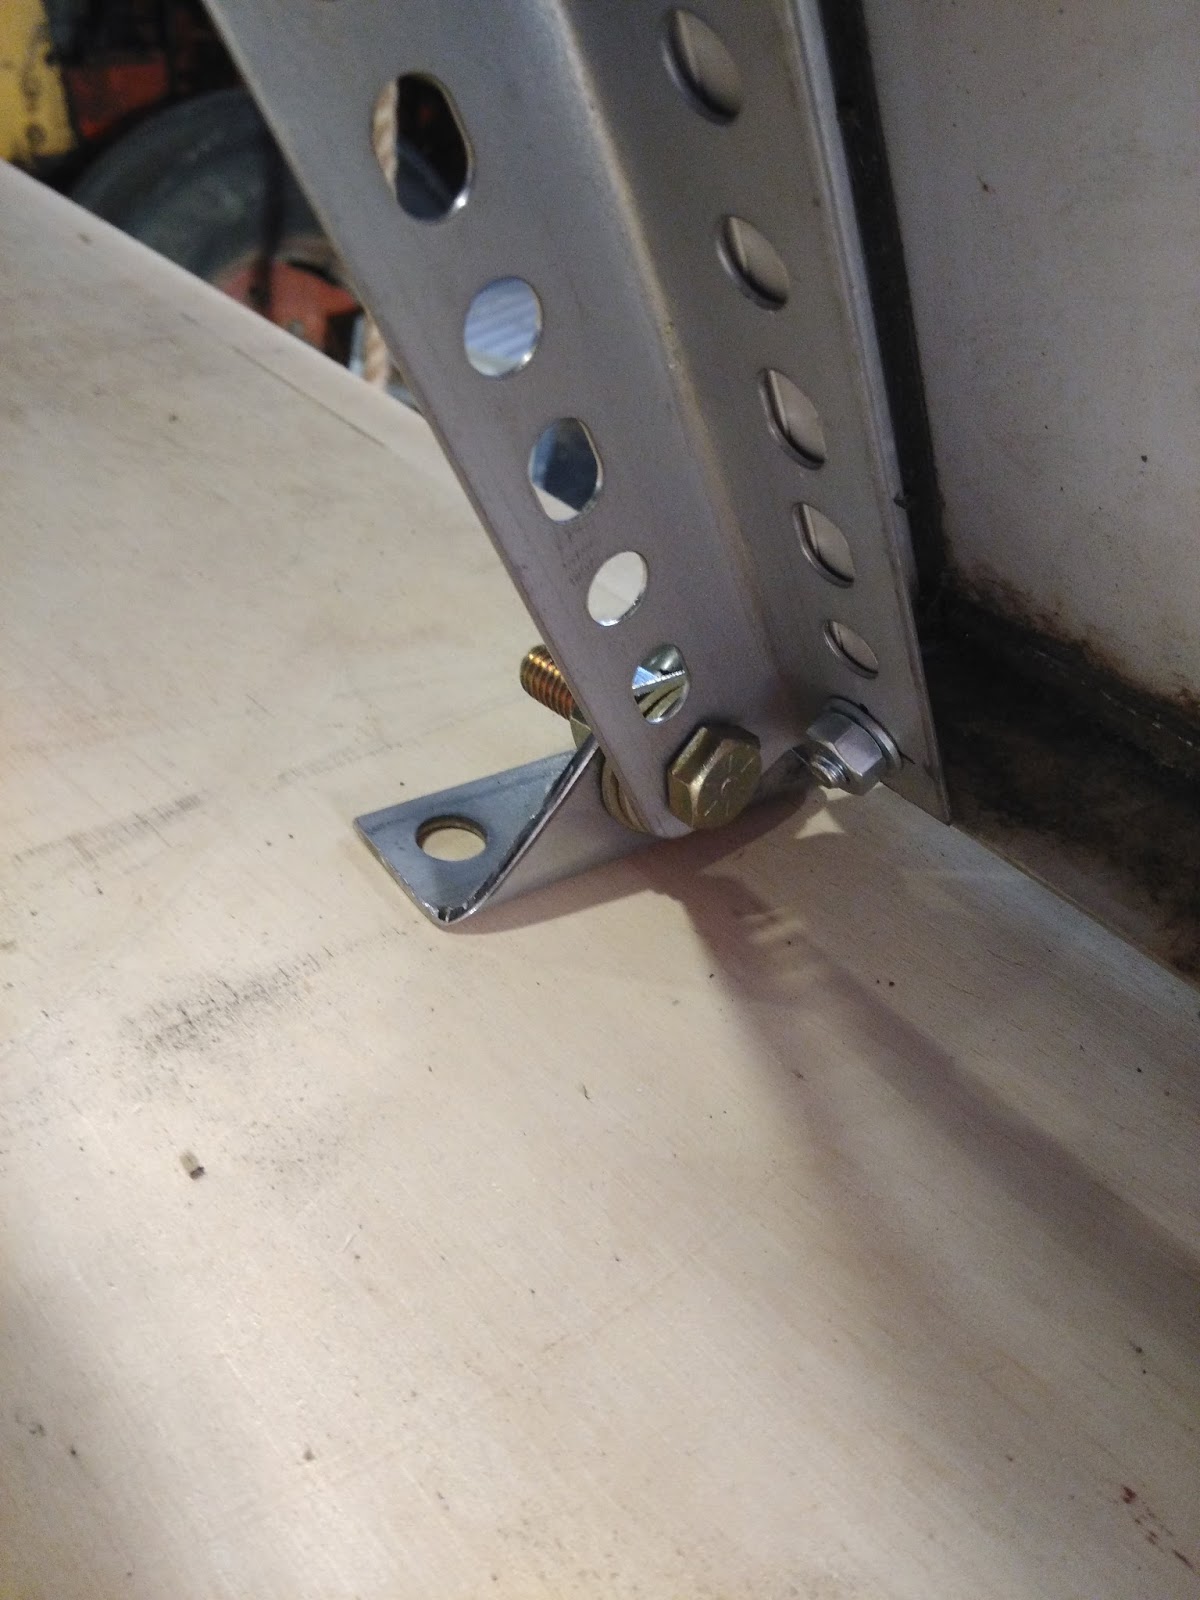
The mount feet are 1-1/2 x 1-1/2 12GA steel angle. The mount rails are 2' chunks of 1-1/4 x 1-1/4 18GA steel angle, with the bottom corner filed round to pivot freely.

Using a 4', 1/4" steel rod roughly bent to shape while cold with a vise, I can make a triangle to secure the panel upright. The rod acts as a spring, pushing out into the holes of the perforated angle, and could be easily adjusted for different seasons. The bottom of the "V" would have a bushing, and go into another mount foot. The angle would also be different on the curved roof of the bus; once the pivot feet are all mounted in line at a good spot on the bus roof, I could come through and position the support rod's mount so that it could adjust between 20 and 66 degrees, and hopefully some kind of stowed position.

With a functioning prototype, I went to work cutting out feet and rails from stock.

In total, I made 18 feet (which is overkill, I'll have extras) and six pairs of mirrored rails. I left Tractor Supply with another $15 bag of 1/4x20 nuts and bolts. Now for the tedious task of removing flashing and burrs with a file... I really ought to get a bench grinder...
No comments:
Post a Comment