Day 10084

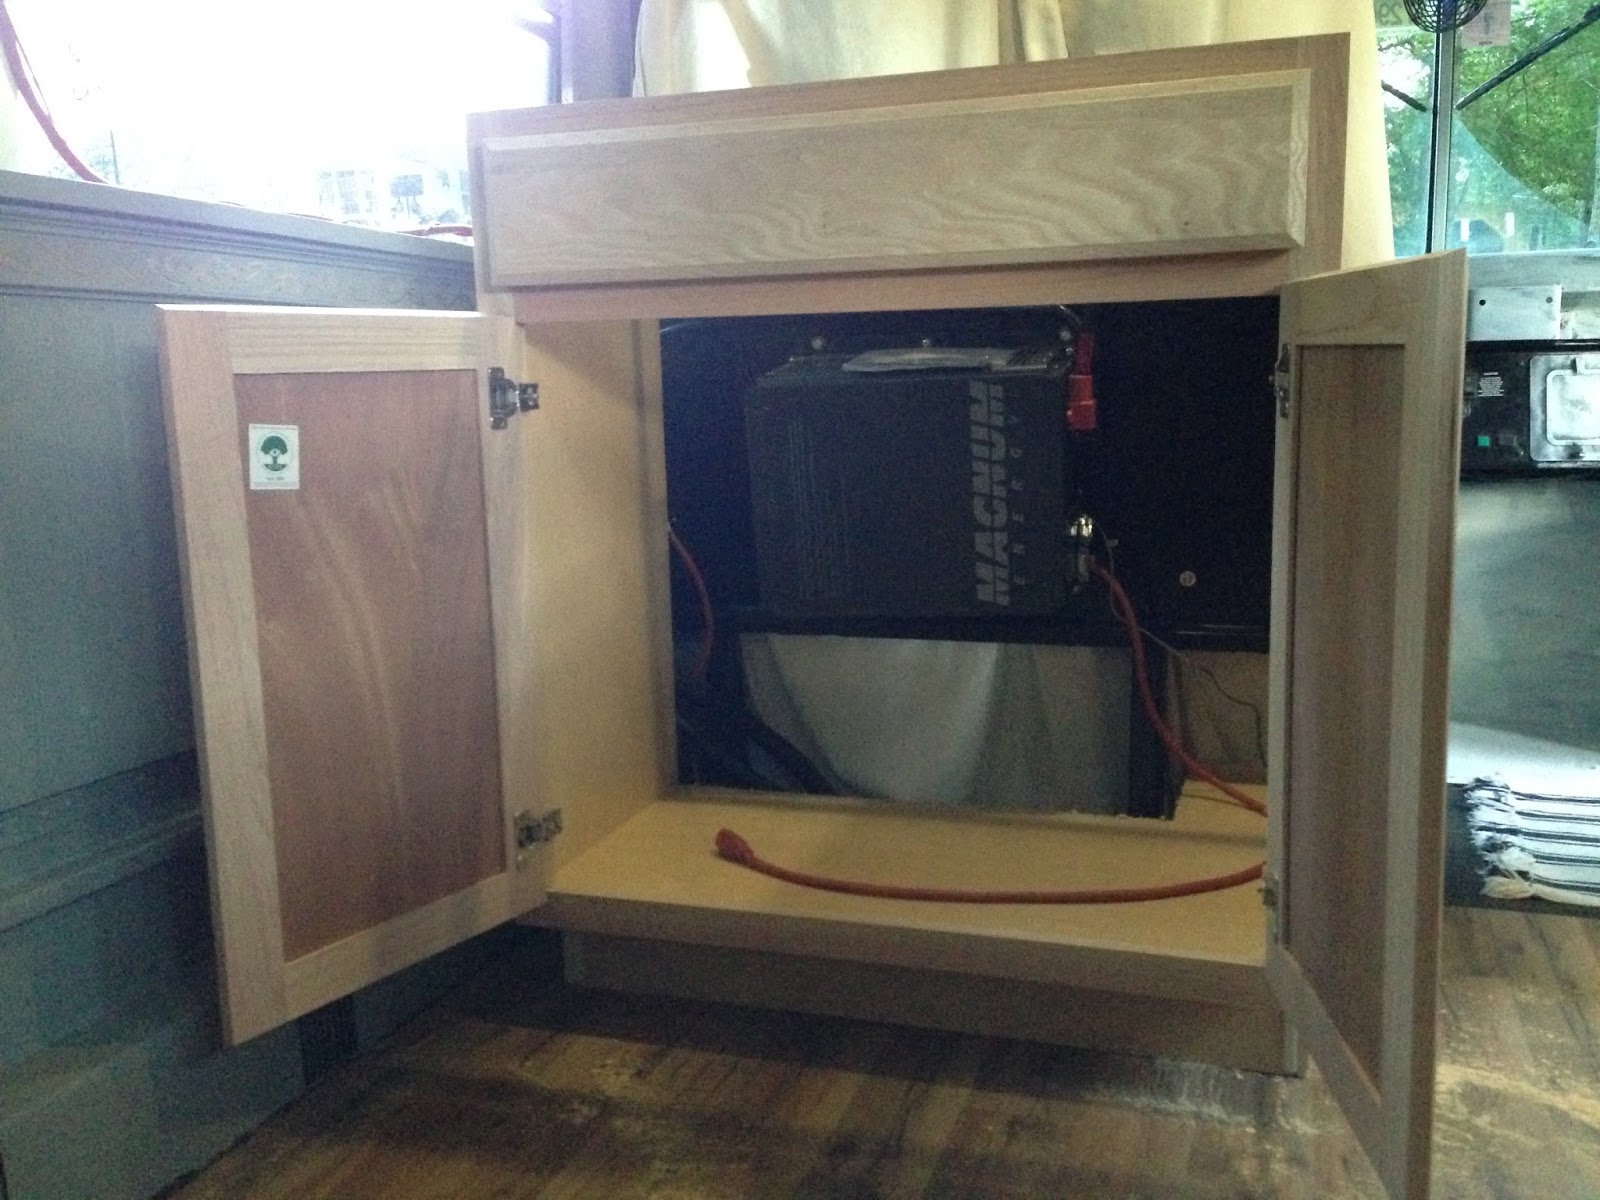
The bus will soon be finished. I'm down to the finishing touches on the water drainage system, dc-side electrical system, and the front door.

Other ongoing projects outside the bus are the land search, and the backhoe rebuild. The backhoe, a 50 year old machine, hasn't had a thorough servicing at least since I bought it in April of 2014. I replaced the seals in the backhoe's control valves last summer, but the slightly corroded spools have destroyed another set of packings, and it is leaking again (part of my environmentally friendly campaign of returning hydraulic oil to the ground where it came from.) My plan to colonize leans heavily on this Swiss Army Knife being in good working order, and it really needs some attention before I move out. 

As mentioned a few weeks ago, I found a compatible backhoe tower for sale on craigslist, and plan on stripping my old one of all the good parts, moving them to the new tower, and replacing everything worn out as I go. I started this undertaking on Day 10081. 

First off, I'd have to get the backhoe in a position where I can safely disassemble it. The Case turned over slowly, and a quick check of the battery revealed it was mostly dead...


I jumped it off the F350, and used my dad's tractor to bring the new tower next to the tractor. Once I got it running, I laid out the boom, dipper and bucket on the ground, and gently set the stabilizers to take the weight of the backhoe. The backhoe frame is held onto the tractor by four pins; two that come out on top, and two that aren't removed, which rest in a cradle on bottom. With some assistance from a crowbar, and by gently moving the stabilizers, I found the sweet spot and removed the top two pins.


I had thoroughly coated the pins with anti-seize compound when I installed them last year, which paid off with their easy removal.


With both pins out, I raised the backhoe off the tractor's frame with the stabilizers, and set it down on jacks and blocks. Hydraulic fluid comes through large pressure and return lines, which need to be disconnected from the backhoe and reconnected to the tractor to keep the system open. With these lines out of the way, I drove the tractor away from the hoe. I'd like to take advantage of the tractor being that much smaller and more maneuverable and take it into the barn to change out all the fluids and filters, too.


That done, I made some French toast and coffee! The Partners propane cook-stove, made in Idaho, does a fantastic job; it is light, boils water quickly, and won't blow out in a breeze.


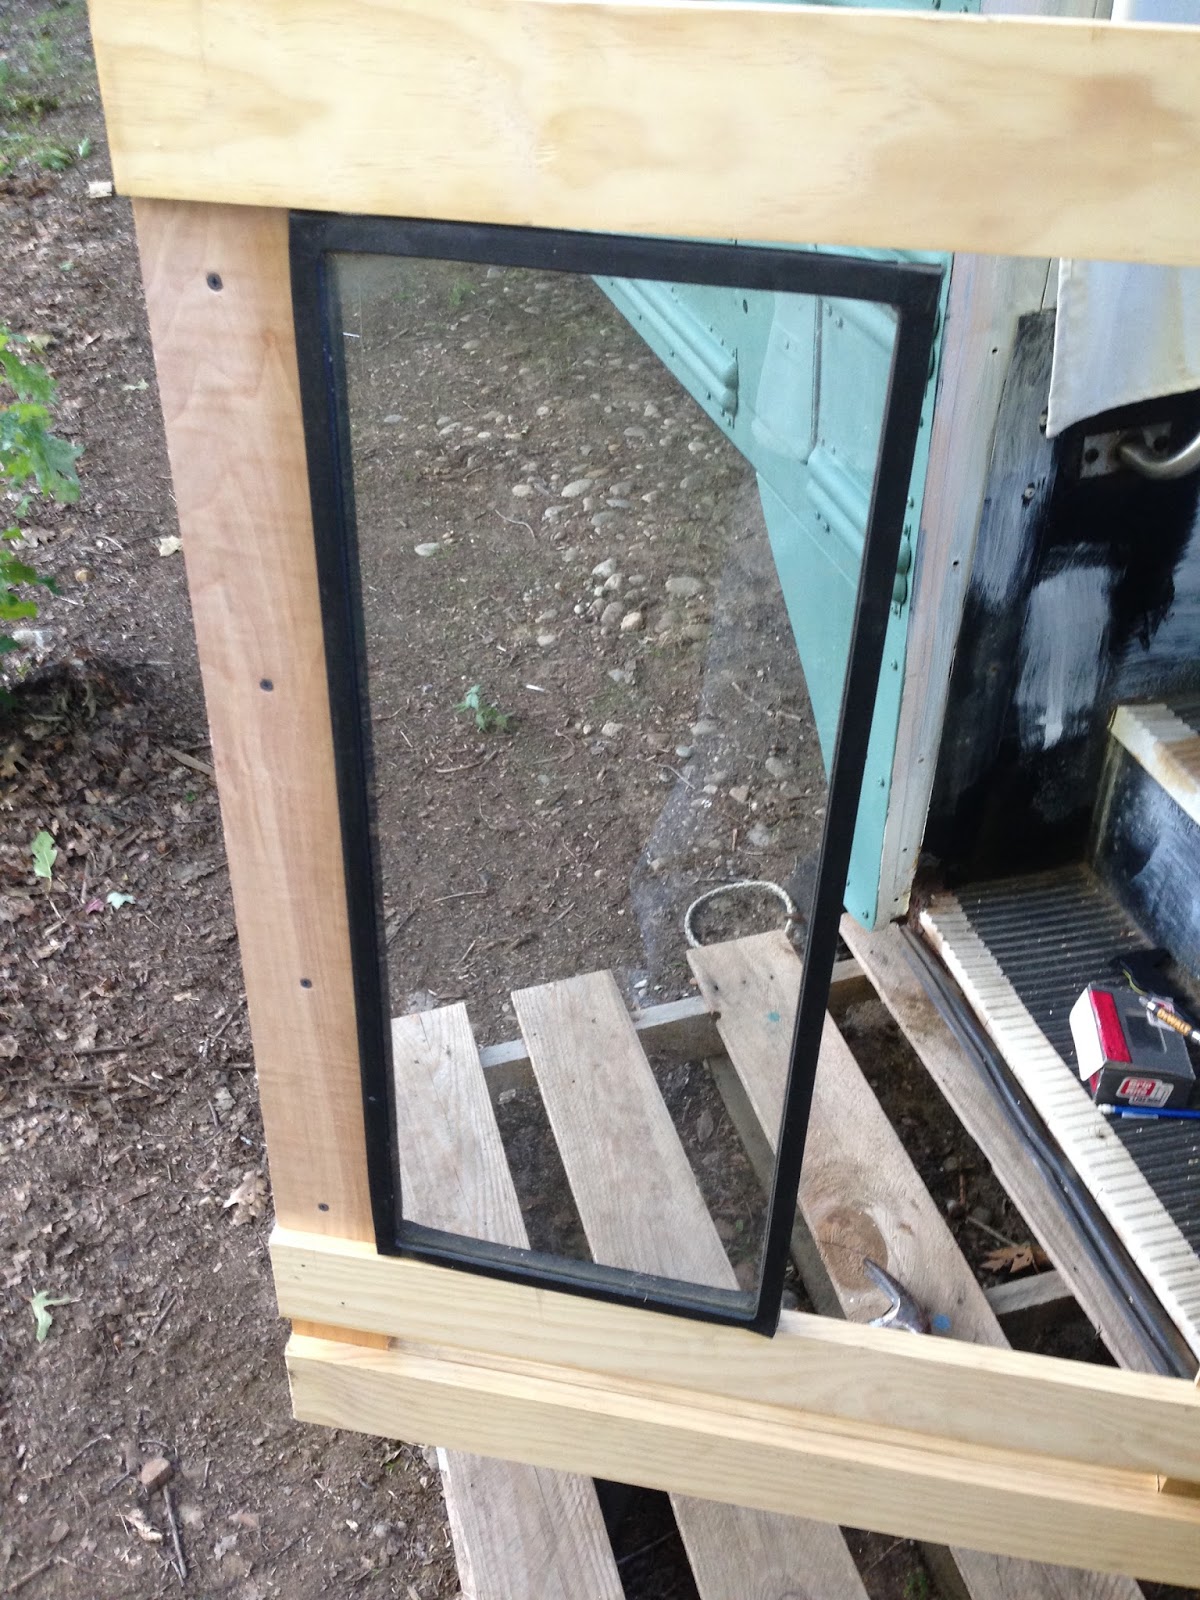
I purchased some 3/16" oak plywood for the front door, which will be the lip the rubber window frames will be held in by. It took some work, but I was able to get all the windows worked onto the plywood.


A piece of aluminum strip keeps the windows snugly locked into the door frame.


All together and ready for trimming! The plywood and aluminum do an excellent job keeping the windows secure; they don't move a bit when the door is shaken.


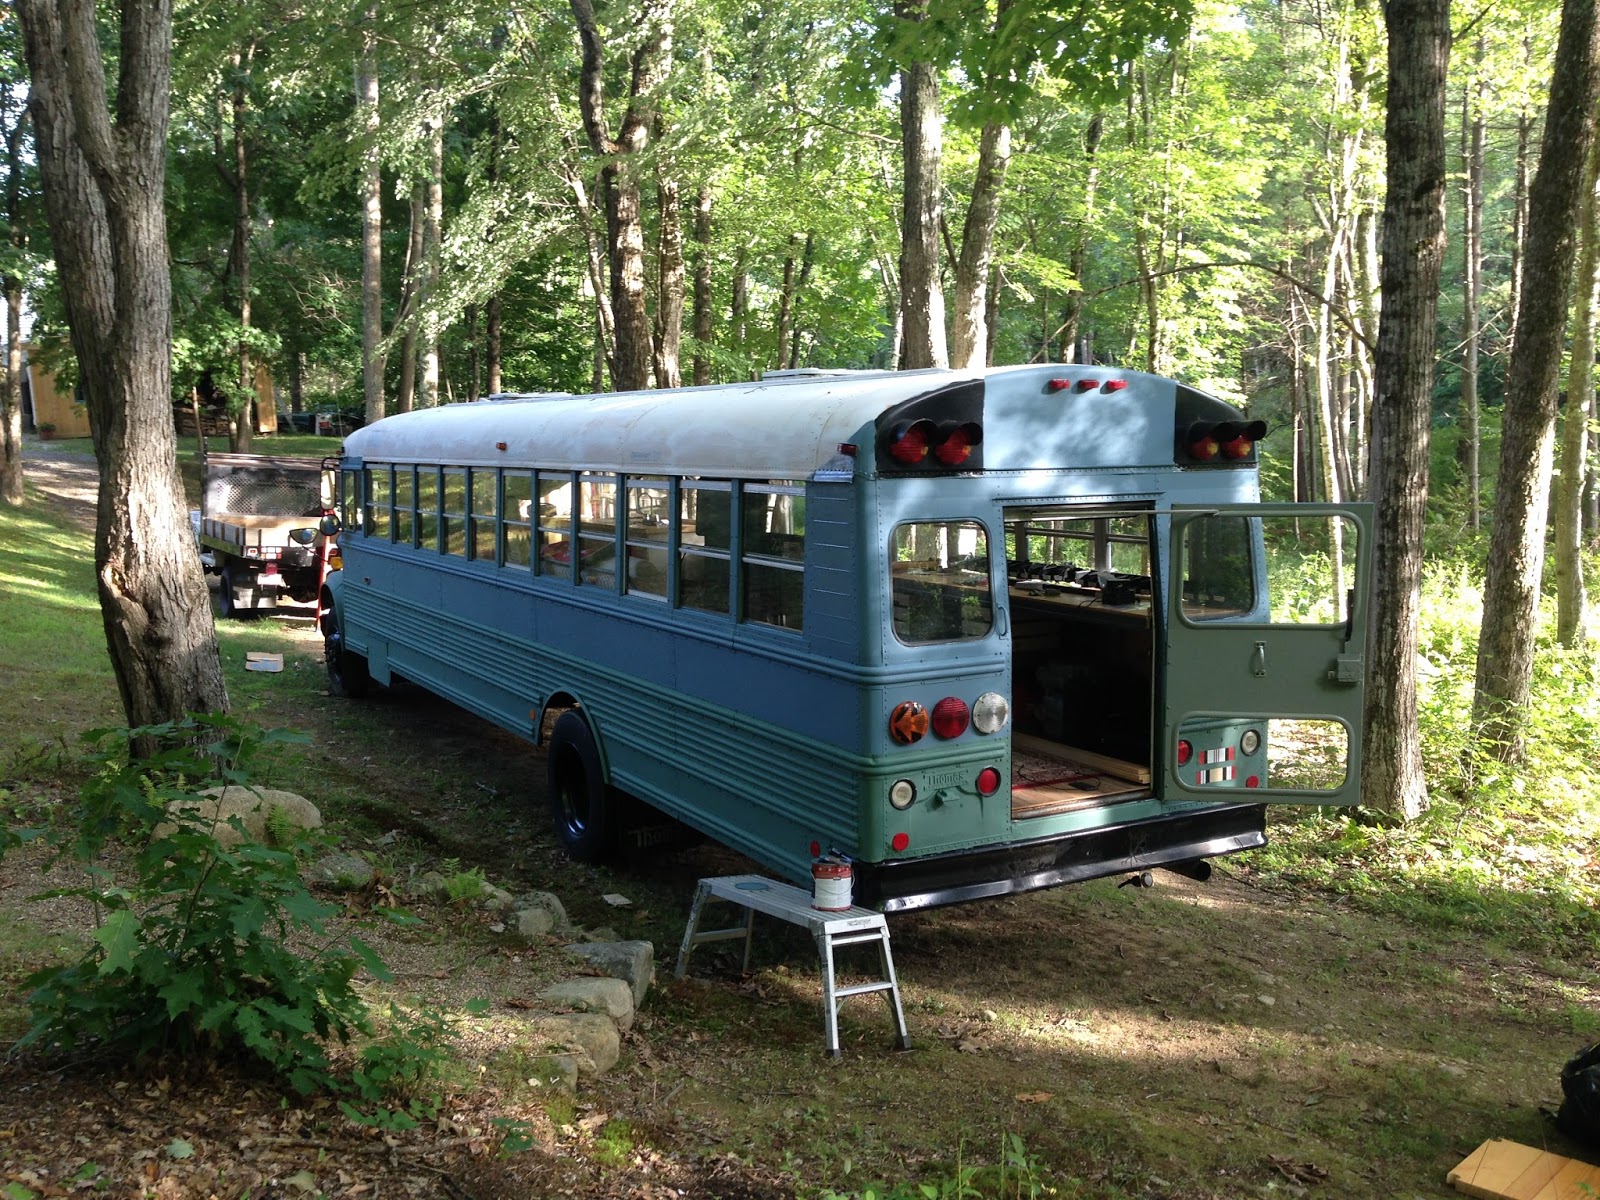
As I type, I have the bus running to recharge the battery bank. I took the next few days off from work to get it finished, which is my version of a vacation.

Day 10077

I have done a bunch of little things since the last post. Here is the water tank setup under the floor;


This is my 12v pump under the kitchen sink. I haven't filled the tank yet, and I still need to create a drain for the sink. Weekend project.


I elected to go the extra mile and paint the cockpit. After a thorough cleansing I slapped on primer. This section of the bus will probably end up the same color tan that I used in the kitchen area.


After trying, and failing, to find a used cabinet base the right size to shield the electrical panel, I bought one from Lowes. I cut out a good portion of the back using a jigsaw, so that it would sit flush with the metal panel. I'm going to get some kiln-dried wood in order to make another countertop to match what I already have in the kitchen.


Chopped cabinet dry-fit. The goal is to shield the electrical panel from damage, hide a mess of wires, create an electrical plug counter, and deafen the buzz of the running inverter, while maintaining sufficient cooling airflow. I can also stash some things away inside of it. This cabinet might end up painted red or green.

I still need to run wires for the 110vac to either side of the bus before I screw this thing down. Weekend project.


I attacked the old bus doors with a drill and screwdrivers. I drilled out the rivets holding a backing plate on, then slowly and cautiously pried the glass out of the metal frames.


I plan on using the old bus windows in my new wooden bus door; which is probably going to be this coming weekend's project. Multi-tasking.


I got the tags for the bus today. I'm street legal!


I just need a door. Ehh... details.


For an afternoon break on Day 10074, Dad and I enjoyed a fresh pot of percolated Guatemalan coffee, cooked on a propane camp-stove on the bucket of a 1960's Case backhoe... just like the original pioneering settlers and fur-traders of New England in the 17th century. 

Roughing it!


Day 10073

Getting home from work on Day 10072, I popped a hatch and started painting the roof with Behr semi-gloss Anonymous... also known as "light gray." 


I usually have music playing while I work, otherwise I tend to wander off and get distracted. I bought this little Porter Cable radio to hold me over while my DeWalt "jobsite" radio was down in Guatemala with the unit. I've had that DeWalt radio for nearly ten years now; it has been through dust storms and mortar attacks in Southern Iraq, been frozen in New Brunswick, endured rocket attacks in Jalalabad, and through the jungles and around the volcanoes of Guatemala, twice. It has more flight time than many in the unit. It has been on more C-5 flights than me. Other than a loose tuner knob, it works perfectly. This little Porter Cable radio lasted about three months before the power cord broke, at the back of the converter. In the US. On a bus. With no one shooting at it. Real nice, Porter Cable. 

I took my alligator-clip test leads and ran it off of a DeWalt battery; I fixed it!


This morning I went right to work mounting one of the water barrels. Originally I had planned on mounting all three tanks today, but since I'm making this up as I go I elected to just mount a single tank to work the bugs out. I laid out a canvas under the bus so I wouldn't be rolling around in the dirt.

I'd like to reiterate that all the power tools you see in photos are running off the inverter, which draws power from the battery bank, which is charged by an alternator, driven by a diesel engine. Off-grid machine shop. Diesel-powered self-repairing school bus.


I drilled some holes through the bottom of the "I-beams" made at the unions of the floor segments, and installed two tie-down fittings. The ratchet straps came from US Cargo Control, which is my go-to site for anything needed to make something stop moving. I debated some additional shoring for the tank, but rubbing/vibration aren't going to be a big concern of mine using this as a parked camper. If I was building a rig for a highway tour of North America I probably would have built a nice frame and secured it a little more snugly. 2000lbs of restraint for a 240lb load (30 gal * 8 lbs/gal water) should be fine.


I could still smell the cleaning agent that had been in this triple-rinsed food-grade barrel, so I gave it another triple-rinse with water and a generous helping of Dawn dishsoap, and let it stew overnight. Now I just smell dishsoap. I'm looking into getting the water that comes out of this tested before I drink it. Not only would bad water destroy my kidneys, but it really throws off the taste of coffee.

I took an early morning trip to Lowes to buy all the fittings I thought I needed to mate a 30-gal barrel to a 12v RV pump and a kitchen sink. I saved a lot of time, money and frustration bringing my cheap plastic vernier calipers (seriously, one of my favorite tools) and a notebook into the store with me, and measuring everything. I put in a stopcock and an external spigot, in addition to the line running to the pump. On the top of the barrel I installed a fill port with a garden hose attachment.

Originally I planned on doing the whole thing in PEX with all the PEX fittings and PEX crimps. Do you know how expensive all of that PEX stuff is? The normal, US-made pipe clamps in the picture below are an illustration of how I didn't spend $40 for a PEX crimping tool that's only good for one thing, and a $10 bag of 10 crimps. 


There was a lot of unknowns with the water pump. Would it pump air? How much could it suction? How high could it pull water up a line? Using two bottles, one empty and one full of water,  and two 12v batteries, I conducted many trials. This little 1 gal/min pump is quite capable.


Tell NASA, I have evidence of running water! How, you may ask, do I get water pressure? Well, I simply flick the toggle switch to engage the water pump, and open the sink's hot water valve. 30 gallons of water and a 1gpm pump gives me about 30 minutes of running water in the bus.

I didn't get a picture of the underside, but the water pump is mounted in the cabinet base. It draws water through a hole in the floor to the water tank. The switch receives power from the battery bank.


My water project mostly complete (I don't have the pieces I need to make the drain) I continued painting. I hit the caution light corners, hood and the window gutters with blue. I think it really cleaned up the bus, and made it look quite nice. Glad I painted over the black parts.


That thin white line is where one of the double-door hinges was bolted on the side. I removed it so I could have a spot for my water fill spigot. I'll touch that up with some green tomorrow.

My "yard" is a mess but I'm out of energy. Tomorrow I'll work the last few kinks out of the water system, and touch up paint on the exterior. I started priming the cockpit; it will look way better painted.


Need a door.

Day 10067

Checking the weather this morning, the chance of storms in the afternoon had dropped significantly. I could continue painting, but everything was still wet from last night's rain, so Zeke and I climbed into the truck to survey another property.

This property is much cheaper, for many more acres, than the previously mentioned land. It's on a south-facing hillside (not a cliffside like some I've looked at) in a rural area of an accessible town. No white oaks or white pines, though. Or running water. These aren't deal-breakers, but it would be very convenient. It did have some larger hemlock, and a lot of big old sugar maples (those I want!) I liked the location, as did Zeke.


Back home, I continued painting. The area behind the engine cowling has all sorts of weird corners.


I brought the blue's edge up to the natural edge of the cowling.


I'm having second thoughts about the black areas around the caution lights. It might be less eye-catching without them. I'm going for subtlety here, and anything that helps the bus not look like a bus is beneficial.


The rear end, complete except for the occasional drip or streak of paint. The door will probably get a nice mountain when I get to that stage. OEF and OIF bumper magnets installed.


Look! It's almost done! You can barely see it! I think it looks about thirty times better with the window frames painted blue.


Next up; gloss white for the roof. Water. Door. One more cabinet for the "electrical closet." Done.

Day 10066

The main focus over the last two weeks has been painting. Priming occurred in stages; at least five several-hour painting sessions before I had the whole bus covered. As I mentioned in the last post, I did a lot of it by hand with a brush. Masking would have taken forever, and I don't have all the equipment to spray. I used a roller on the roof, and parts of the sides, but you really need a brush to get into the nooks and crannies.

This was one of the those times where I asked myself whether I was working on a car or a house. I decided painting a house was easier and cheaper, so I elected to get house paint! The bus was roughly primed with a bit more than a gallon of Kilz. I got the majority of the dirt off, but had no qualms painting right over embedded pollen around rivet heads. No regrets.


Watching the weather forecast nervously, I finished painting the green layer this morning. I used Behr water-based exterior paint. I laid the green on heavy, then went over the thin spots around the bus after the first coat had dried. I think it looks good!

I tried to match the contour on the engine cowling, and "flow" around objects on the front of the bus. I still intend to paint a mountainscape across the side, but I haven't figured out how I want to do it yet. In the interim I'll have a "plainscape."


I ended up ordering another set of curtains to separate the cockpit from the cabin. It does wonders inside. 

I know, I still need a door. Details.


I think I'll keep the black "corners" around the warning lights. I didn't mask them, so they'll need some attention when the majority of the paint is on. 


The green on, I cracked open the can of blue-gray, and started painting all the rivets and screws and edges. Once all the difficult to cover pieces were hit, I went back through and hit all the big empty spots. It seemed to go faster working the trouble spots first. I'll continue the blue-gray line up to the top of the windows. The roof will get rolled with gloss white.

With rumbles of thunder in the distance, I put the paint away. Looking at the forecast, I don't think I'll get much more painting done this weekend.


Posted at work by an anonymous source... I could totally pull that off. 

Day 10054

One of my minor roadblocks just resolved itself, much to my surprise.

I had the voltage regulator removed from the alternator; it wasn't one of the adjustable kind, and I was trying to come up with a way to lie to the thing's inputs so it would tell the alternator to put out higher voltage. I cleaned the contacts, and reinstalled it so I could check voltage at a few more places with the multimeter. After running the motor for a minute with a drill bit across the brushes (anyone that has taken apart an alternator before knows this is a rookie move,) I found that the bus was pushing 14.9 volts! I verified with my multimeter... problem solved! I'm guessing that cleaning up the corroded contacts was all it needed.


Running smooth. Pushing out 14.8 volts, and about 40 amps, at 600rpm.


I let the bus run for about an hour this morning; it continued charging at 14.8v, and after I shut it down the voltage held strong at 12.8v. I couldn't ask for anything more. Below is the voltage screen on the Trimetric, with the approximate charges a series-parallel bank of Trojan T105's will have at corresponding static voltages scrawled on the window. Below 12.1v I could damage the deep-cycle batteries, so 50% is a notional "dead." I'd like to wire the bus so that it cranks over automatically at 60% capacity remaining.


This is the percent charged screen on the Trimetric; my bank is charged to 100%!


On a slightly random aside, I recommend Tractor Supply for hardware purchases. I've been trying to build up my "bench stock" of hardware, so that I might have something I need on-hand instead of having to drive out to get a new one. On the bus I've been using a lot of 1/4"-20 hardware to keep things secured. Below is a pound of 1/4" and 5/16" nuts and bolts, which sell for $1.99/lb at Tractor Supply. If you go to Lowes or the Depot or Ace you're paying that for a package of three or four of these bolts.

I also save all the hardware I find while taking things apart, and throw it in the bins I showed you all a few weeks ago, by size and thread.


With my battery bank charged, and extension cords coiled up and put away, I broke out a pencil and paper, and my drill with a hole-saw. I measured out and marked the counter where the sink would fit. With the drill plugged into the inverter, and the inverter drawing off the battery bank, I drilled the corners of the sink's hole. I had the battery monitor set to display Amps, and out of an over-abundance of caution I tried not to exceed 30 amps while cutting. The monitor is looking at the input amps to the inverter. The 120v output leg I'm wired off of is rated to 30 amps, and I imagine the inverter would draw more amps to make the 30 amps it could produce safely, but I took it easy anyway. I balanced tool speed and pressure applied into the work to keep it around 25 amps.


I don't know if it's because I'm running on a modified sine wave, or if the inverter needs a small load before it "kicks in," but power tools don't turn slowly when you gently depress the trigger... it's more like an air tool where you have to give it an almost full squeeze to get it going, then back off to a lower RPM. Otherwise both the drill and the router ran smoothly. Nothing got hot, nothing was smoking, and I didn't burn the bus down. Success!


My surplus sink, installed solely on bus power. All told, this project used a mere 5.5 amp-hours of the 450 amp-hours I have available.