I know I left you all with a cliffhanger with my last post. Welding needed? Let's be honest, you were probably saying to yourself something like; "Oh no! The cheap craigslist farm truck has a cracked frame cross-member! Then Aaron pulled the truck bed off with a backhoe instead of going to a professional!"
And now, the conclusion...
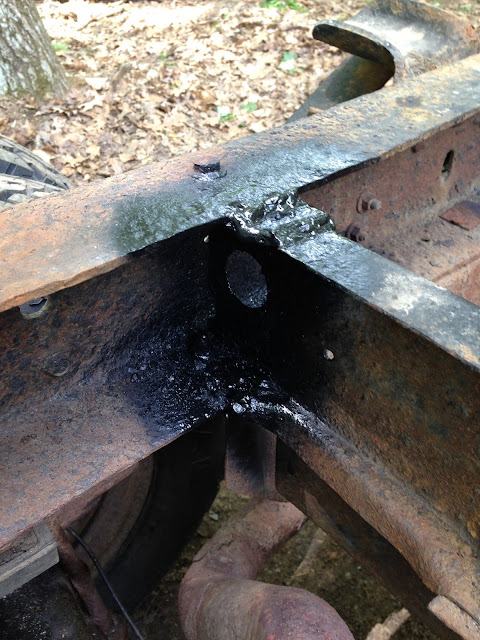
Here's one of our cracks.
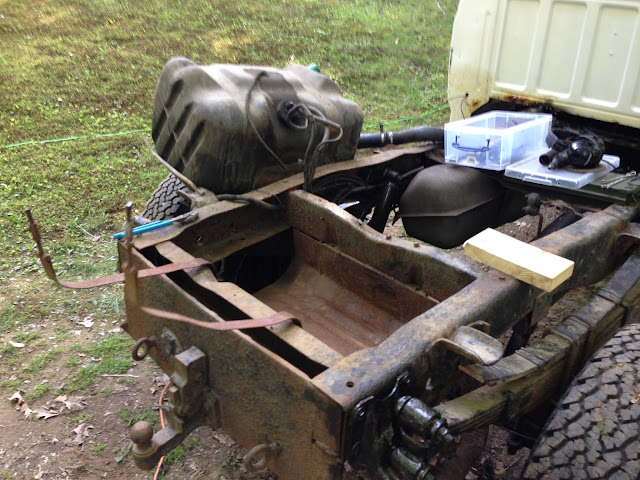
I cut the straps on the aft plastic fuel tank, and without actually disconnecting it, set it out of the way. I'm less concerned about sparks and fiery explosions (it's only diesel) than I am about damaging the plastic tank as the metal frame heats up from a weld.
For this crack I added some scrap metal to the frame to bulk up the area. I ground the rust off the area to be welded so I could run a smoother, cleaner bead.
I promise, despite how these look, that they have good penetration into both metals. I used #6011 rod, which does better with rust, but typically comes out looking like it's the first time you've done it. I tried a bead of #7018 on here but I kept losing the arc on rust spots. #6011 is known as "Farmer's rod."
After cleaning off the slag I put a thick coat of paint on the fresh weld.
And while I had the bed off, I went to town with the Fluid Film. I've sprayed about seven cans onto the truck's frame, and it looks so much better. Not only does Fluid Film smell amazing, and stop corrosion in it's tracks, but it blackens the frame again, too.
I reinstalled the fuel tank, and added the fuel fill line. I didn't finish that job this weekend; they are still very difficult to get to. I need some more fuel hose.
Bed back on! It actually went on pretty smoothly; I lifted it up with the backhoe, then drove the truck under it as close to center as I could get. I gently set it down, loosened all but one strap, then used the farm jack to pull it straight onto the frame.
Remember those threaded rods I cut off with the angle grinder? These are replacing them. I got custom U-bolts bent up at Central Auto Recycling in Concord. We had a miscommunication, based on the clarity of my highly technical drawing (not-to-scale pencil sketch on notebook paper,) and one pair of U-bolts was too short to reach. Central Auto gave me another set on the house. Thanks guys!
The flat pieces on top are pieces of 3"x1/4" steel stock, cut with an angle grinder, then pain-stakingly drilled out with a 5/8" hole saw on a 1/2" drill... I need to invest in a drill press. They all went on pretty smoothly, and now the truck bed is secured again!
In the bus I was able to do some work this weekend. Perusing craigslist I found a set of four of the style of chair that I wanted. Brent, from Craigslist, was kind enough to meet me halfway in Manchester on a Sunday afternoon. I can sit down now!
I also installed the shelves, which still need trimwork. The shelf over the bed-to-be I added another board to, so that large books would fit standing up. To keep it more stable and less flimsy, I backed off a screw on the ceiling, wrapped 550-cord around it, then tied it off to an eyebolt on the shelf. When all the strings were nice and tight, I put a dab of epoxy on my knots. You know what they say; "If you can't tie a knot, tie a lot... and put a dab of epoxy on it."
On a final note, Dave showed me this cool video of what happens to our old school buses in Central America. These trambillas or chicken buses are cruising all around Guatemala, and some are very well done!


No comments:
Post a Comment